
This is more of a write up than one of my usual posts, so bare that in mind. I'm sure this post may be full of inaccuracies but this represents my best effort as well as me hoping what i learnt might help other people.
Introduction
This isn’t a cheat guide on how to do well in XE221. Really it isn’t. This is just a guide as to how to go about building a robot that’ll work well and survive longer than one fight.
Safety Notice
I am not responsible in any way for you cutting your hand off with your own robot, or anything similar. This is a guide. It says guide in the title. If it’s too dangerous don’t do it, don’t consider it. For an example, if you don’t know how to deal with Lithium Batteries correctly, or are told not to use them, then don’t use them!
You should take extreme caution with Lithium Polymer batteries and pressurised CO2 systems. These can be deadly if mishandled.
Research
Do your own research into featherweight robots. There are many different concepts, designs and attempts at how to build a robot, so get out there on the internet and do your research. There are many, many, many robot videos you YouTube, including previous university fights, as well as guides on how to build robots.
University of Brighton Past Videos
Build Rules, Constraints & Weight Limits.
There are a few hard rules in this contest, as well as a few ‘softer’ rules which may be bent and broken to some extents.
There are two sets of rules that govern fighting robots in the UK fighting robots space, there is the long standing FRA ruleset, and the BBC Robot Wars Rules, many of the rules are similar as the BBC Robot Wars ruleset was derived from the current FRA ruleset when Robot Wars was brought back on-air in 2016 for Series 8/1
These rules listed are a fraction of the complete set of rules, the exhaustive list of rules can be found at either of these two links.
- http://www.fightingrobots.co.uk/documents/Build-Rules.pdf
- http://www.robotwars.tv/media/1462/robot-wars-build-rules-v3-3.pdf
If you want to build your robot properly this you’ll use these rules and many of them will govern your building process. In addition to this, there are a few rules set out by the university. These are, at the time of writing,
- Your robot must fit into a University of Brighton locker, found in Heavy Engineering.
- It is sugested that you stick to the latest FRA ruleset.
- We retain the right to exclude any machine on safety grounds; this will not affect your marks.
Wheels
There are two routes to go down when it comes down to wheels. You can either laser cut yourselves round wheels or you can buy generic pre-made wheels made of rubber.
The reason why this is so high up on the list is that, for this assignment, if you want to use pre-made wheels you need to choose wheels first, then find a way to attach the wheels to the motor bosses, then work with that and design the rest of the robot.
This is where i made my first mistake when i built my robot. I designed the robot then looked for wheels. I ended up using 18mm MDF wheels and although these worked, they provided no traction when i needed it. Moral of the story – Wheels first, then design.
If you are going to choose rubber wheels i would suggest you for solid rubber wheels, not inflatable types that have a tyre, because these can be punctured.

Tyre & Wheel

Solid rubber
Radio – (Rx/Tx)
The university will provide you with a Turnigy 9X transmitter and receiver. This kit you get will also include a mains charger, a ni-cd receiver battery and two servos.
If you’ve not already figured, the controller has 2 sticks, both with a horizontal and vertical component, and these are usually assigned channels 1 thru 4. The controller has additional switches and controls and these can be dynamically addressed also to the remaining 5 channels (the receiver has 9 channels) How this is done is gone over in the instruction manual
My suggestion is you keep all driving on the right-side stick and use either the left stick or a switch for weapons control.
Basically, if you do not use any ESCs, you need to connect the battery and the two servos to the radio receiver and then attach your mechanical speed controller to the servo and that’s the complete mechanical servo complete.
If you are going to use a ESC you need to think about this in a slightly different way, but this is covered in Speed Control.
Turnigy 9X Manual resources, please note that although the logos are sometimes different it is in fact the same hardware and compatible.
- https://hobbyking.com/media/file/725056143X2037269X20.pdf
- https://app.box.com/s/cb3b695b7552a051d351
- https://app.box.com/s/28842be884bc568f61e6

Turnigy 9X Transmitter
Turnigy 9X Transmitter

Turnigy 9X Receiver
Turnigy 9X Receiver
Battery
So your choice of battery is rather important. It’s essentially what type of fuel your robot is going to run on. When I did this assignment, the batteries that came with the drills that we were given were Ni-Cd. That stands for Nickel-Cadmium. A rather interesting battery technology. Essentially for this task, they’re hard to overcharge and damage unless you short circuit them. But, you must remember to recycle them correctly, when cadmium leaks into ground water this isn’t good for anyone.
If you’re a little luckier, you might get lithium type batteries. These are somewhat more powerful, but this comes with a catch – you must be careful how you treat them, as I’m sure most of you have seen what happens when lithium batteries go bad.
- Lead-Acid
- Old
- Heavy
- Not allowed in any rulesets.
- Sealed Lead-Acid
- Allowed, but avoid as heavy.
- Acid is trapped for formed into a gel sheet between the electrodes to there is no risk of acid spillage.
- Can be used in any direction.
- Maintenance free for their lifetime.
- Nickel-Cadmium
- Older generation nickel batter.
- Can handle rapid, high current discharges.
- Hard to get hold of, illegal to manufacture and import in some parts.
- However, cells suffer from the “memory effect”
- Toxic to the environment.
- Nickel Metal Hydride
- Newer generation nickel battery.
- Up to double the capacity of NiCd and Better for the environment.
- Hard to get hold of, illegal to manufacture and import in some parts.
- Cannot handle high current discharges.
- Twice the standby discharge rate of Ni-Cd
- Lithium Ion
- Good energy density, relatively low self-discharge and low maintenance, excluding charging.
- Expensive.
- Transportation restrictions.
- Need balance charging to avoid damaging battery.
- Lithium Polymer
- Incredible energy density, very high. They have a habit of bursting into flames at any time. For any kind of charging they need to be balance charged.
- Overwhelmingly used in fighting robots.
- Also expensive
- Transportations restrictions apply.
- Lithium Iron-Phosphate
- A somewhat safer evolution of the Lithium Ion, but at the time of writing they’re expensive and tricky to charge.

Lead Acid

Sealed Lead Acid

Nickel Cadmium

Nickel Metal Hydride

Lithium Ion

Lithium Polymer

Lithium Metal Phosphate
Charging of Lithium Batteries
If you are going to use lithium batteries, you must make sure to charge them correctly. This is done using a balance charger.
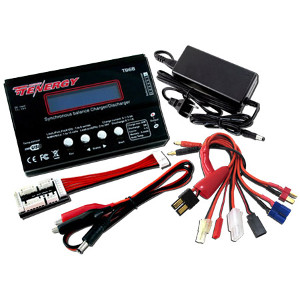
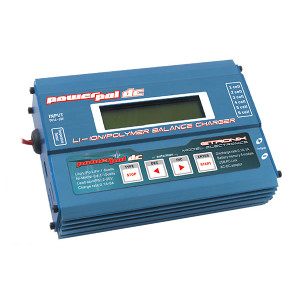

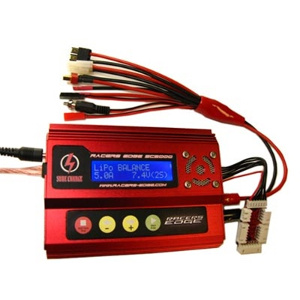
A balance charger chargers a battery in such a way that each cell that makes up a battery is charged fully and correctly. You need to use a balance charger with lithium batteries because sometimes the cells, during charging, charge at a slightly different rate and therefore have a slightly different voltage. This can lead to overvoltages within the battery which can be dangerous especially with lithium battery packs.

Prototype
The very first thing you should do is construct a rough prototype. Mount the motors and wheels onto a bit of MDF along with all the electronics required to get the robot to move.
This will give you a idea as to how to drive the thing along with handling, and any kind of best practices that you might need to think about.
My Prototypes
I built several prototypes to demonstrate how the robot would work. I used 9mm MDF and had it laser-cut at the university. These are shown below. I used these to demonstrate functionality of the robot, the electronics, the drive system and as a demonstration of how to assemble the final metal version. I highly recommend building one. or two.

Version 3

Version 2
Weapon
Don’t expect much content on Weapons, my robot did not have one, so I didn’t investigate this fully.
Adding a weapon to your robot is a good idea. And according to the rules, it’s actually necessary. In the rulesets, your robot must have one active weapon. Anyone who has seen the BBC’s robot wars knows that weapons really make or break your robot, and sometimes they can physically break your robot too!
At university level, you will be able to get away with not using a weapon, like I did. If you want to apply for robot wars or cause some major damage go for a weapon.
Weapon types can be spinners, lifters, flippers, full body spinners and crushers.
Case in hand – My robot went up against a spinner. It scared me at first, how was my flimsy 2mm steel box going to survive a spinner at 100rpm? Well luckily it turned out to have no torque. I rammed straight into it and it stopped spinning.
Removable Link
You must have a removeable link. This is a link that you can remove from your electrical system, that renders the robot safe, so it’s not going to drive off on its one. This is one of the rules that you can’t break. You really can’t, and there’s good reason for insisting on a link instead of a switch. The Americans allow a key to turn electrical systems on and off, but us Brits insist on a removable link as switches tend to weld themselves together, especially under high loads. This has happened on occasion on BattleBots. More information can be found here. These links refer to Heavyweight robots but the same concept applies to featherweights.
http://robotwars.wikia.com/wiki/Removable_link
https://www.youtube.com/watch?v=hqQp-L7E_jE
https://www.facebook.com/UKRobotWars/videos/841662679331416/
- Good contenders for links are;
- Anderson connectors
- HXT connectors
- XT60 connectors
- Deans T-type connectors
- Molex Connectors (the type found on old CD/HDD drives)
- Bad contenders for links are;
- Banana Jacks & Sockets
- Bullet connectors
- Spade connectors
- The battery clip that came with your drill

Anderson Connector

HXT Connector

XT60 Connector

Dean Connector
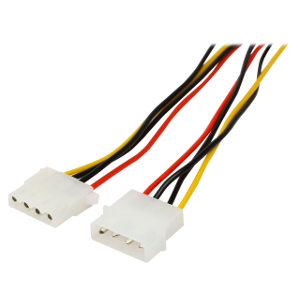
Molex Connector

Bullet Connector

Banana Connector

Spade Connector
Speed Control
You have two options.
> Mechanical Speed Control
> Electric Speed Control
Mechanical Speed Control
Carbon brushes are attached to the servo arms, and a specifically milled copper plate it attached to the base of the servo, in such a way that increasing the servo arm’s position decreases a resistance between the battery and the motor and the motor speeds up.
> Simple to understand.
> Suitable for motors.
> Provided by the university for free.
Electric Speed Control (ESCs)
Online market places, such as eBay are currently awash with cheap no-name Chinese ESC, and these can be used successfully, to some extent. These ESCs use a MOSFET type H-bridge design. These sometimes have the downside that to make manufacturing cheaper the design will include different MOSFETs for reverse and forward, so the robot travels slower in reverse than it does forward.
> Cheap & plentiful.
> Likely over-rated. (ie. The seller lied about the actual maximum ratings)
> High attrition rate.
Practice
You could build the most wonderful featherweight robot with bespoke weapons and finely filled metal edges, but if you can’t control it, drive it or get it to go where you want then what is the point?
If you are using servo speed controllers, you are going to need to practice a lot more than if you are going to use ESCs. And also if you are not using a v-tail mixer you will need to practice re-orientating your sense of what “forward” is.
Spend time driving it around. Drive it over a smooth surface, a paved service, grass even, just so you can get a feel as to how your robot handles. Practice avoiding objects, practice pushing a brick around.
Practice makes perfect, after all.
My Robot for XE221
My robot is by no means the best design. I’m sure if it was submitted to an actual robot wars contest and not the universities, it would be torn to shreds. But with that said, this is my design and it came joint third with a bunch of other robots at the university robot competition.
My robot was relatively simple yet effective in my opinion. The robot was designed in CAD from the get-go. The steel panels were CNC plasma-cut, and then MIG welded together to form a basic metal box. I later beefed up the front plate with Hardox 450 for any spinners i might come up against as the steel panels are only 1.5mm thick. The Hardox & steel front panel is in total 7mm thick, enough for any spinner that i might come up against in the university competition.


Slick Productions, April 2017
Please note, all this work has been submitted to turnitin, so ripping it off of this website may not be the wisest move.
Recent Comments